
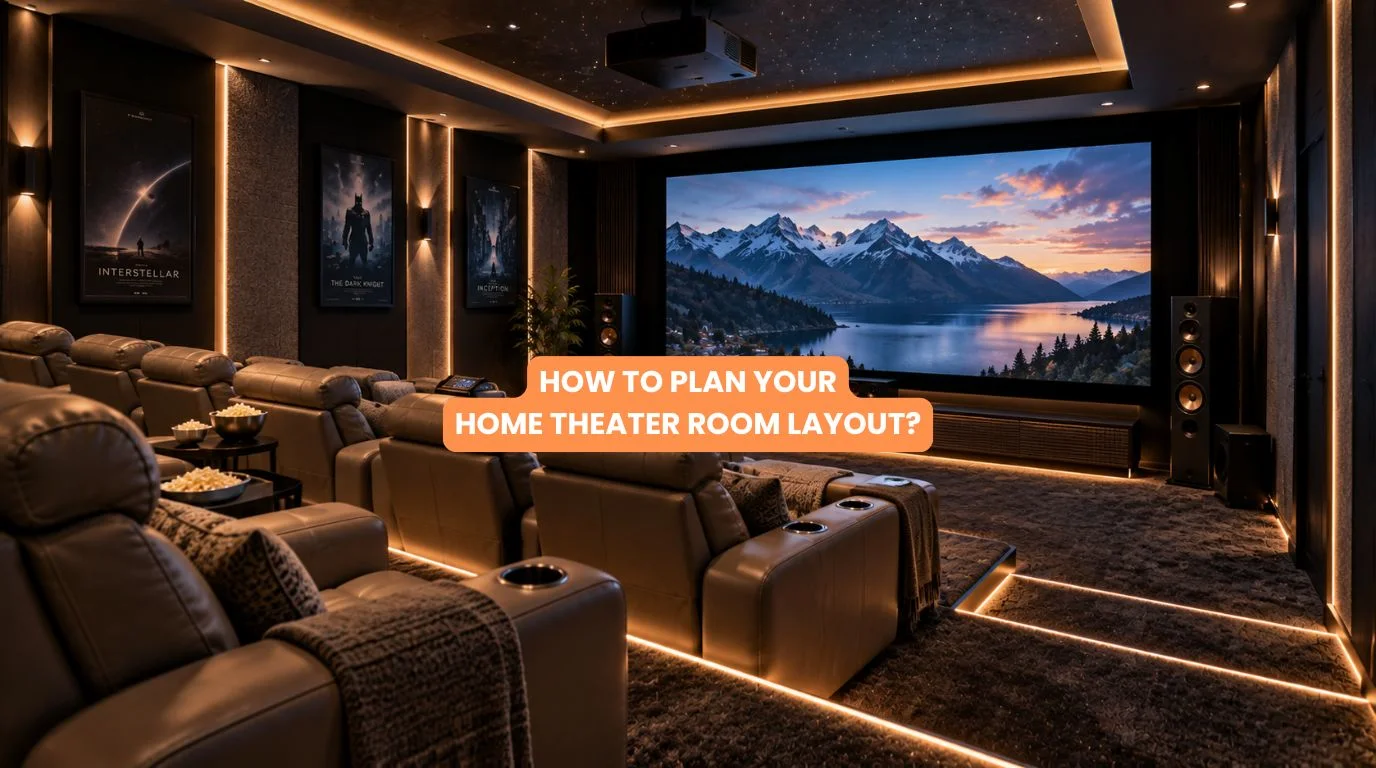
A great home theater isn’t created simply by buying a large screen and an expensive sound system. The room itself is part of the theater.
Screen size, seating distance, speaker placement, acoustics, lighting, equipment location, and room shape all affect the experience. They can make it feel immersive, or just like a TV in a dark room. That is why planning your home theater room layout before buying equipment matters.
At Techtastic, we recommend starting with the room rather than starting with the projector, speakers, or AV receiver. Once we know the room size and how the family will use it, we can choose the right screen. We can also plan the seating, speakers, sound treatment, and automation.
Whether you’re designing a dedicated cinema room, converting a bedroom, or creating a basement theater, the right home theater room layout can make a substantial difference.
Quick Summary
When planning your home theater room layout, consider:
✓ Room length, width, and ceiling height
✓ Screen size and viewing distance
✓ Number and position of seats
✓ Front, center, surround, and overhead speakers
✓ Acoustic reflections and bass management
✓ Projector or TV placement
✓ Equipment rack location
✓ Lighting and blackout requirements
✓ Door placement and entry paths
✓ Ventilation and HVAC noise
✓ Electrical and network infrastructure
✓ Future upgrades
The best layout is not necessarily the biggest one. It is the one where every component works together.
Quick Answer
A good home theater room layout generally follows this sequence: Screen → Front Speakers → Seating → Surround Speakers → Rear/Overhead Speakers → Equipment → Acoustic Treatment → Lighting
For a dedicated theater, room proportions matter as well.
As a practical starting point, a room around 20 ft × 15 ft × 9 ft can provide a solid base for a home theater. Smaller rooms can also work well with the right system design.
For larger screens, viewing distance becomes particularly important. You don’t want to sit so close that the image feels uncomfortable. You also don’t want to sit so far away that the screen loses its immersive effect.
Therefore, plan the room around the viewing experience rather than simply filling the available space with equipment.
1. Start With the Room Dimensions
The first step in creating a home theater room layout is measuring the room.
Record:
- Length
- Width
- Ceiling height
- Door positions
- Window positions
- Columns
- Beams
- HVAC vents
- Electrical points
- Existing wiring
- Possible equipment locations
A rectangular room is often easier to work with than an irregular room because speaker positioning and acoustic treatment become more predictable. That doesn’t mean an unusual room cannot become a great theater. It simply requires more careful planning.
A useful planning reference
For a premium dedicated theater, approximately 20 ft × 15 ft × 9 ft can provide a comfortable starting point. However, a home theater room layout should always be customized to the actual room and equipment.
2. Decide Where the Screen Goes
The screen is the visual focal point of your theater. Ideally, position it so viewers can maintain a comfortable, centered view without moving their heads excessively.
Consider:
- Screen size
- Screen height
- Seating distance
- Projector throw distance
- Speaker placement
- Door locations
- Viewing angles
For a projector-based theater, plan the screen with the projector, not as a separate decision.
The projector needs sufficient throw distance, while the screen needs to remain at an appropriate height for the seating. This is why screen and projector specifications should be considered early in your home theater room layout.
3. Choose the Right Screen Size
Bigger isn’t automatically better. A 150-inch screen might look spectacular in a large room but feel overwhelming in a smaller space.
Your screen size should be determined by:
- Room depth
- Seating distance
- Screen resolution
- Viewing preference
- Projector capabilities
- Aspect ratio
For many dedicated theaters, a 120–150 inch screen can feel truly cinematic, but the best size depends on the room. The goal is to create immersion without visual fatigue.
4. Plan the Seating Before Installing Speakers
One of the most common mistakes in a home theater room layout is positioning speakers first and then trying to squeeze the seating into whatever space remains. Do the opposite.
Determine: Where will people sit?
Then design the speaker positions around those seats.
Consider:
- Primary viewing position
- Number of seats
- Recliner dimensions
- Walking paths
- Distance from the rear wall
- Second-row seating
- Sightlines
For a single row, the primary seats should ideally be positioned centrally within the room.
If you have two rows, the second row may need a raised platform to maintain proper screen visibility.
5. Don’t Push the Seats Against the Rear Wall
This is particularly important for sound. Sitting directly against the rear wall can create problematic bass behavior and reduce the effectiveness of rear surround speakers. Where possible, leave some space between the primary seating and the rear wall.
A practical planning guideline is approximately 3–5 feet, depending on the room and seating arrangement. Room and acoustic analysis should ultimately determine the exact position.
A properly planned home theater room layout considers the seating position as part of the acoustic design—not just furniture placement.
6. Plan Your Speaker Placement
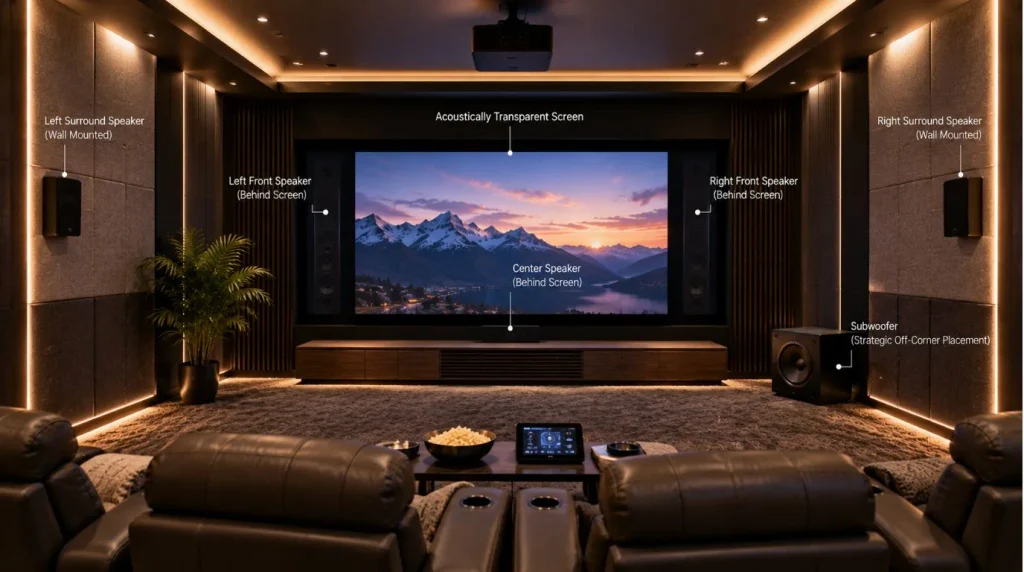
A home theater is an audio environment as much as a visual one. Depending on your configuration, you may have:
- Left speaker
- Center speaker
- Right speaker
- Surround speakers
- Rear surround speakers
- Subwoofers
- Height/overhead speakers
For a Dolby Atmos-style system, overhead speakers can add a vertical dimension to the soundstage.
The exact configuration should be selected based on:
- Room dimensions
- Number of seats
- AV receiver
- Speaker capabilities
- Listening positions
Your home theater room layout should therefore be developed around the intended audio format.
7. Don’t Forget the Subwoofer
Bass behaves differently from high frequencies. Low-frequency sound interacts strongly with the room’s walls and dimensions. This can create areas where bass sounds extremely powerful and other areas where it seems weak.
People know this as room-mode behavior. That is why simply placing a subwoofer in a convenient corner isn’t always the best solution. In some rooms, using multiple subwoofers can produce more consistent bass across several seating positions.
This should be considered during the home theater room layout stage rather than after installation.
8. Acoustic Treatment Is Part of the Layout
A beautiful theater can still sound disappointing if the room is acoustically untreated. Hard surfaces such as:
- Glass
- Tile
- Concrete
- Bare walls
- Hardwood
can reflect sound.
Too many reflections can reduce clarity and create an uncontrolled soundstage. A good theater may use:
- Absorption panels
- Bass traps
- Diffusion
- Acoustic wall treatments
- Carpet or suitable flooring
- Fabric-covered surfaces
Importantly, acoustic treatment is not the same as soundproofing.
Acoustic treatment improves sound inside the room. Soundproofing focuses on reducing sound transmission between rooms. Your home theater room layout should consider both if noise leakage is a concern.
9. Plan Projector Placement Early
If you’re using a projector, don’t wait until the end to decide where it goes.
Projector placement depends on:
- Screen size
- Throw ratio
- Lens characteristics
- Ceiling height
- Mounting location
- Seating
- Cable routes
- Ventilation
Ideally, position the projector so it doesn’t block the view or create unwanted noise. For premium installations, a concealed or carefully integrated projector setup can keep the room visually clean.
10. Plan the AV Equipment Location
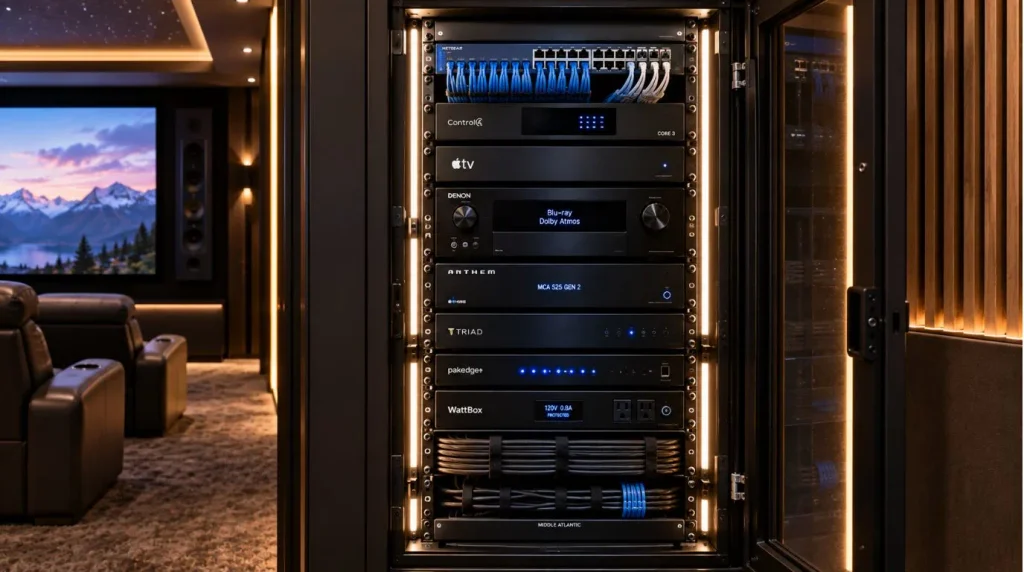
Your AV receiver, media player, network equipment, and other components need a dedicated location.
Depending on the design, equipment can be placed:
- Beneath the screen
- Inside a cabinet
- In a dedicated equipment rack
- In an adjacent technical room
For a luxury home theater room layout, we often prefer keeping equipment organized and ventilated rather than allowing multiple components to sit visibly around the room. Remember that electronics generate heat.
So you should consider ventilation when you design the equipment location.
11. Lighting Matters More Than You Think
A cinema room shouldn’t simply be “dark.” It should have controlled lighting. A well-designed lighting plan can include:
- Recessed ceiling lights
- Wall sconces
- Step lights
- Cove lighting
- Accent lighting
- Low-level aisle lighting
Ideally, lighting should be dimmable and divided into zones.
For example:
Movie Mode
Main lights → Off
Accent lighting → Low
Step lighting → Minimal
Cleaning Mode
All lights → Bright
Entry Mode
Aisle and entrance lighting → On
This is where smart automation can turn a good home theater room layout into a more polished experience.
12. Integrate Curtains and Blackout Control
Natural light is one of the biggest enemies of a projector-based theater. If your room has windows, blackout curtains or motorized blinds should be considered from the beginning.
You can create a simple Movie Scene: Press one button → curtains close → lights dim → projector activates → AV system starts.
That is far more convenient than operating five different devices before every movie.
13. Don’t Ignore HVAC and Ventilation
A theater room can become warm surprisingly quickly.
You have:
- Multiple people
- Amplifiers
- Projectors
- Media equipment
- Closed doors
- Acoustic treatments
That makes climate control important.
At the same time, HVAC noise can interfere with quiet movie scenes. A good home theater room layout should therefore consider:
- Air-conditioning location
- Vent placement
- Return-air paths
- Equipment heat
- Noise levels
- Temperature control
For premium installations, climate control can also be integrated into the home automation system.
14. Plan Wiring Before the Interiors
This is one of the most important steps. Before walls and ceilings are finished, plan:
- Speaker cables
- HDMI/fiber connections
- Ethernet
- Power
- Projector cabling
- Subwoofer connections
- Control wiring
- Lighting
- Automation infrastructure
Running additional conduit can also make future upgrades easier. You may not know today which projector or AV receiver you’ll purchase five years from now.
A flexible infrastructure gives you options. This is why professional home theater room layout planning should happen before final interior execution.
15. Consider Sightlines for Multiple Rows
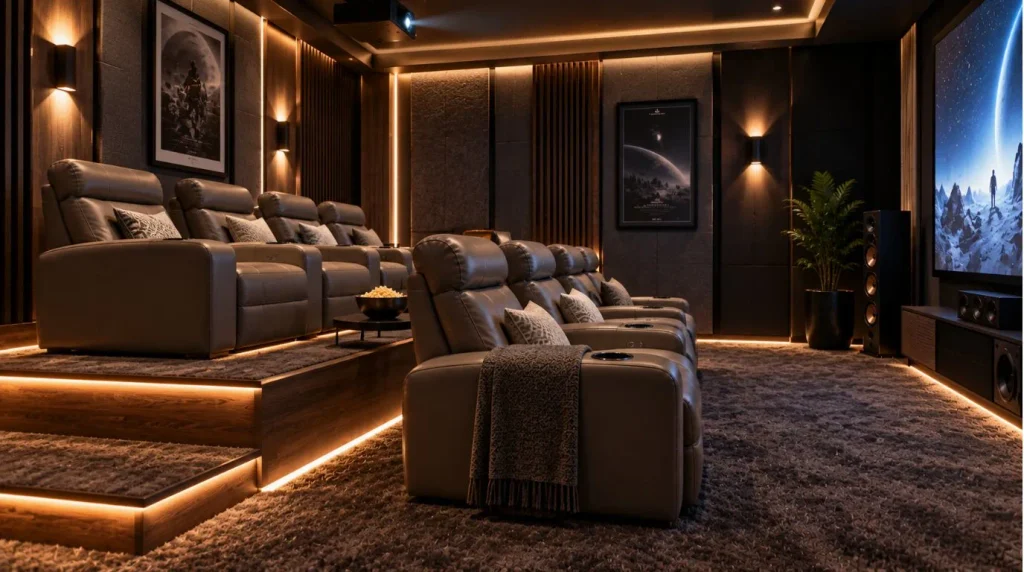
If you want two rows of seating, don’t simply place another row behind the first. The second row needs a clear view of the screen. A raised platform or riser can help achieve this.
You also need to account for:
- Head height
- Screen height
- Speaker locations
- Walkways
- Rear surround positioning
- Ceiling speakers
The theater should feel comfortable for everyone, not just the person sitting in the center seat.
Sample Home Theater Layout
| Component | Recommended Planning Approach |
|---|---|
| Screen | Centered on front wall |
| Front speakers | Positioned around screen |
| Main seating | Central viewing zone |
| Rear clearance | Ideally leave space behind seats |
| Surround speakers | Positioned around seating |
| Atmos speakers | Planned relative to seating |
| Projector | Based on screen and throw requirements |
| Subwoofers | Positioned after considering room acoustics |
| Equipment | Ventilated rack/cabinet |
| Lighting | Multiple dimmable zones |
| Curtains | Blackout/motorized where required |
| HVAC | Quiet, well-planned airflow |
What Is the Ideal Home Theater Room Size?
There isn’t one perfect size. You can create an excellent theater in a smaller room if you select the equipment and layout correctly.
For example:
12 ft × 12 ft: Suitable for a compact theater with appropriate equipment.
15–18 ft depth: Can provide more flexibility for larger screens and seating.
Around 20 ft × 15 ft × 9 ft: A comfortable reference point for a dedicated premium theater. Avoid choosing equipment first and then forcing it into the room. Room dimensions should influence equipment selection.
Common Home Theater Layout Mistakes
1. Buying the Biggest Screen
Bigger isn’t always better.
2. Ignoring Seating Distance
A screen should be selected based on the room and viewing position.
3. Putting Seats Against the Wall
This can create acoustic and bass problems.
4. Forgetting Equipment Heat
AV equipment needs appropriate ventilation.
5. Treating Acoustics as Decoration
Acoustic treatment should be designed for the room, not simply added as wall décor.
6. Installing Speakers After the Interiors
Speaker locations should be planned before ceilings and walls are finalized.
7. Ignoring Lighting
Cinema lighting contributes significantly to the overall experience.
8. Forgetting Future Upgrades
Infrastructure should allow for future equipment changes where practical.
How We Plan a Home Theater Room Layout at Techtastic
At Techtastic, we approach a home theater room layout as a complete system rather than a collection of products.
We consider:
- Room dimensions
- Seating capacity
- Screen size
- Projector requirements
- Speaker configuration
- Subwoofer positioning
- Acoustic treatment
- Lighting
- HVAC
- Networking
- Equipment rack
- Automation
Our objective is to make every component work together.
A premium home theater shouldn’t feel like a room filled with equipment. It should feel like a cinema.
Key Takeaways
When planning your home theater room layout:
- Start with room dimensions.
- Plan seating before speaker placement.
- Select the screen according to viewing distance.
- Position speakers around the listening area.
- Consider acoustic treatment from the beginning.
- Leave appropriate clearance behind seating.
- Plan projector throw distance early.
- Provide proper equipment ventilation.
- Use dimmable, zoned lighting.
- Integrate blackout curtains when necessary.
- Plan wiring before interiors are completed.
- Consider HVAC noise and airflow.
- Leave infrastructure for future upgrades.
Frequently Asked Questions (FAQs)
1. What is the ideal home theater room layout?
The ideal home theater room layout depends on room dimensions, seating, screen size, speaker configuration, and acoustics. There is no single layout that works for every home.
2. What is a good size for a home theater room?
A dedicated room about 20 × 15 × 9 feet is a useful guide for planning. Smaller rooms can still produce great results. Use equipment that fits the room size.
3. How far should seating be from the screen?
Viewing distance depends on screen size, resolution, and personal preference. The seating should be selected together with the screen rather than independently.
4. Should speakers go behind the screen?
In some dedicated theater designs, an acoustically transparent screen lets you position speakers behind it. This can create excellent front soundstage alignment.
5. Should home theater seats touch the back wall?
Generally, it is better to leave some space behind the seats when the room allows it. This can improve acoustic performance and surround placement.
6. How many speakers does a home theater need?
It depends on the desired audio format. Systems can range from basic 5.1 configurations to more advanced Dolby Atmos layouts.
7. Is acoustic treatment necessary?
For a dedicated theater, good acoustic planning is highly recommended. It can improve clarity, bass consistency, and overall listening quality.
8. Should I use a projector or TV?
A projector can provide a more cinematic experience with a large screen, while a high-quality TV may offer easier installation and strong image performance in smaller rooms.
9. Can home automation control a theater?
Yes. A properly designed system can coordinate lighting, curtains, projector, AV equipment, HVAC, and other functions through scenes.
10. When should I plan my home theater room layout?
Ideally, planning should happen before electrical work, false ceilings, and final interiors. Early planning makes wiring, speaker placement, acoustics, and equipment integration significantly easier.
Collaboration Opportunities for Architects & Interior Designers
A successful theater requires collaboration between architecture, interiors, acoustics, AV, and automation.
Architects and interior designers can work with Techtastic early in the project to coordinate:
- Room proportions
- Seating
- Screen wall
- Projector position
- Speaker locations
- Acoustic panels
- False ceiling
- Lighting
- Curtain pockets
- HVAC
- Equipment racks
- Electrical and network infrastructure
This early coordination helps maintain the visual design while ensuring the technical requirements are properly accommodated.
For luxury projects, the best home theater room layout is one where technology is integrated into the architecture rather than added after the interiors are complete.
Areas We Serve
Techtastic works with homeowners, architects, interior designers, builders, and developers across: Navi Mumbai | Nashik | Lonavla | Sangli
We design integrated home theater and home automation solutions for premium apartments, villas, and residential projects.
Final Verdict
A successful home theater room layout starts long before the projector is switched on.
The room’s dimensions determine the seating. The seating influences speaker placement. The speaker placement affects acoustics. The screen determines viewing geometry. The lighting affects the atmosphere. The HVAC affects comfort. And the automation ties the entire experience together.
That’s why the best approach is to design the room first and choose the equipment second.
At Techtastic, we believe a premium home theater should deliver more than impressive specifications. It should provide the feeling of walking into your own private cinema. And that starts with a well-planned home theater room layout.
Contact Techtastic
🌐 Website: Techtastic Website
📞 Phone: 9769145145
📍 Service Areas: Mumbai • Navi Mumbai • Pune • Lonavala • Nashik • Sangli