
Summary
Planning a KNX smart home system before a renovation requires integrating a low-voltage, shielded green bus cable alongside your high-voltage mains during the raw civil wiring phase. To execute this correctly, you must map out your electrical loads, centralize your distribution boards, and design interlocks for your HVAC, lighting, and shading systems before any plastering begins. This early physical infrastructure layout cuts overall energy consumption by 30% to 50%, eliminates wireless signal lag, and bypasses the expensive civil rework, broken walls, and hardware limitations common with retrofitted consumer gadgets.
The Civil Blind Spot: Why Automation Fails When Planned Too Late
The absolute most expensive mistake you can make during a high-end home renovation is treating smart automation as an afterthought. When I audit luxury residential renovation sites across Navi Mumbai, Nashik, or Lonavla, I regularly see gorgeous, multi-crore interiors torn apart because the homeowner decided to add premium automation after the premium false ceilings had been painted and the Italian marble flooring laid.
If you rely on mass-market wireless smart switches or retrofitted retail modules to save your walls later, you are building on quicksand. Thick reinforced concrete beams, internal brick partitions, and high-performance glass with metallic coatings act as physical shields that block airborne radio frequencies, leading to dropped commands and system lag.
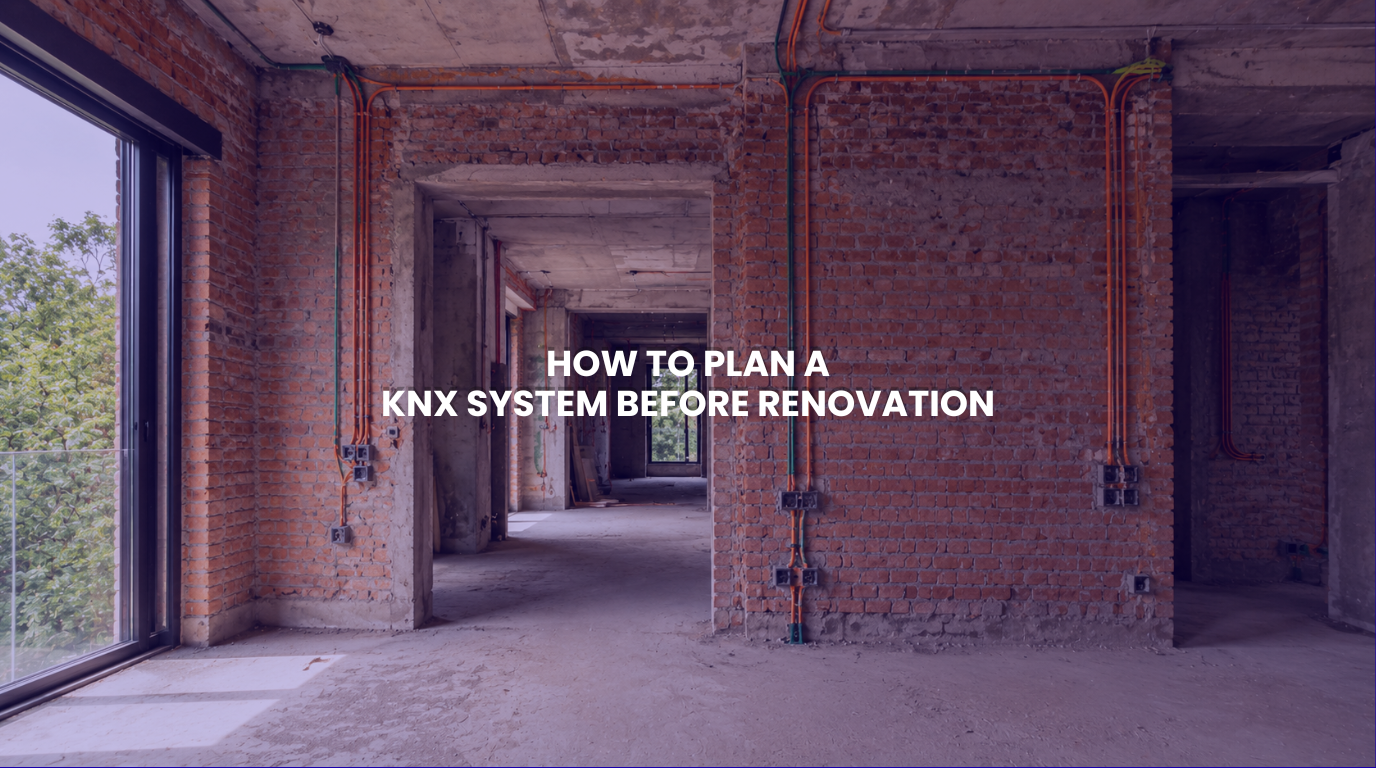
True structural luxury requires an offline, hardwired building backbone. To achieve absolute reliability and a system life that matches the 30+ year lifespan of your home, you must map out your low-voltage communication pathways while the walls are still raw brick and the conduits are completely exposed.
When is The Best Time to Plan Your Home’s KNX Smart Home System Infrastructure?
The best time to plan your home’s KNX smart home system infrastructure is during the initial architectural and mechanical, electrical, and plumbing (MEP) drafting phase, well before any physical brickwork or internal wiring begins on-site. Securing your KNX smart home system automation layout at this early stage allows you to embed low-voltage structural conduits right alongside your standard electrical lines without causing any civil delays.
The Pre-Conduit Shell Stage
Once your interior designer or architect finalizes the basic furniture layouts and space functions, I step in to map the physical conduit routes. This planning happens long before the walls are plastered or false ceilings are framed, ensuring that every single lighting loop, motorized curtain track, and central air conditioning unit has a direct, dedicated path back to the main distribution panel.
Coordinating with Your MEP Consultant
A reliable KNX smart home system layout requires early cooperation with your MEP engineer to prevent system conflicts. By designing your load profiles, electrical switchboards, and HVAC logic interfaces simultaneously on paper, we eliminate the risk of different trades installing incompatible standalone controls that end up fighting each other for space inside your walls.
How do You Map out Electrical Loads for a Centralized KNX Smart Home System Layout?
You map out electrical loads for a centralized KNX smart home system layout by routing every individual lighting circuit, appliance line, and motorized shading track directly back to a centralized distribution panel instead of using traditional, localized loop wiring behind wall switches. This star-topology KNX smart home system wiring structure transfers the system intelligence out of your living spaces and moves it securely inside an engineered electrical board.
[DALI-2 Downlights] ──────┐
[Motorized Shading] ──────┼─(Direct Dedicated Runs)─> [Centralized KNX smart home system panel]
[VRF AC Actuators] ──────┘
Calculating Channel and Amperage Capacities
When I evaluate your interior lighting and appliance layouts, I catalog each circuit by its specific load type and operational current. Magnetic low-voltage LED drivers, heavy landscape lighting loops, and specialized kitchen appliances all require different relay ratings and dimming profiles (such as DALI-2 or 0-10V control). Getting these load calculations right beforehand prevents contact arcing and ensures your expensive fixtures dim perfectly smoothly without any flickering.
Sizing the Central Distribution Boards
Because a hardwired automation system moves all your switching and dimming modules directly into your main electrical distribution boards, these panels require significantly more wall space than a traditional fuse box. Planning this during your renovation allows us to recess these larger panels into discrete service corridors or utility rooms, keeping your main living areas completely clean and free of bulky electrical clutter.
What Structural Preparations are Required for Motorized Curtains and HVAC?
Structural preparations for motorized curtains and HVAC require building dedicated ceiling pockets with raw mains power connections for every curtain track, and running low-voltage data cables straight to your central variable refrigerant flow (VRF) indoor AC communication boards. Ensuring these physical parameters are ready beforehand keeps all your equipment neatly hidden and performing flawlessly.
Designing the Ideal Motorized Curtain Pocket
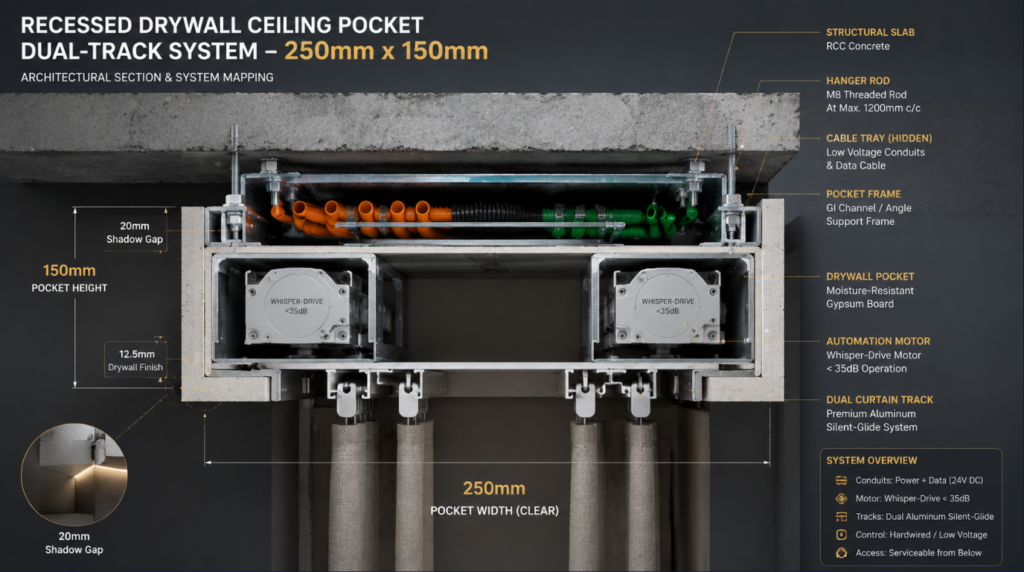
To achieve a clean architectural look where your motorized drapes seem to flow right out of the ceiling, your interior designer needs to frame a dedicated curtain pocket. I recommend a minimum pocket depth of 150mm and a width of 150mm for single tracks, or 250mm for dual-track setups (blackout plus sheer).
We also pull a dedicated electrical conduit straight into this pocket to keep all wiring completely out of sight.
┌────────────────────────────────────────────────────────┐
│ Raw Concrete Ceiling Slab │
└───────────┬────────────────────────────────┬───────────┘
│ ◄────── 250mm ──────► │
│ ┌───┐ ┌───┐ │
│ │ M │ (Blackout Track) │ M │ │ (Sheer Track)
│ └───┘ └───┘ │
150mm Deep │ │
└────────────────────────────────┘ ◄── False Ceiling Line
Integrating Hardwired Climate Control Loops
Instead of sticking uncoordinated, plastic wireless thermostats on your finished walls, we wire your climate system directly into the building’s core backbone. We pull a low-voltage data cable from the centralized KNX smart home system panel straight to the electronic communication board of each indoor VRF unit. This physical connection allows hidden ceiling sensors to regulate your indoor temperature perfectly, eliminating visual wall clutter while trimming your cooling bills by up to 50%.
Why Should You Choose a Hardwired Green Bus Cable Over Wireless Options?
You should choose a hardwired green bus cable (KNX smart home system) over wireless options because a physical data line delivers unmatched system stability, sub-10 millisecond command speeds, and complete independence from unstable internet connections or local Wi-Fi router crashes. Wireless gadgets carry long-term maintenance headaches and risk sudden software obsolescence, whereas a hardwired backbone serves as a permanent structural utility built to last for decades.
The Peace of Mind of an Offline Network
A premium home should never stop functioning just because your internet service provider experiences a local outage or your Wi-Fi router overheats. A hardwired green bus network operates entirely offline on local microprocessors built into each device. Your lights, security systems, and climate controls execute commands instantly and reliably, completely safe from internet drops or external cloud server failures.
Eliminating Ongoing Battery Maintenance Cycles
A large-scale wireless smart home setup can easily require 100 to 200 individual lithium batteries to keep its various motion sensors, automated switches, and window contacts powered up. Managing a system like that quickly turns into an exhausting chore of tracking offline devices and replacing dead batteries.
By pulling a safe, low-voltage shielded green bus cable through your conduits during the raw shell phase, you deliver steady local power and data to every device simultaneously, giving your home a clean, completely maintenance-free infrastructure.
Pre-Renovation Planning Roadmap: Technical Checklist
| Renovation Stage | Core Technical Focus | Primary Automation Action | Long-Term Advantage |
| 1. Architecture & MEP Layout | System Architecture | Map out all lighting, HVAC, and shade loads onto paper blueprints. | Bypasses accidental component mismatches and unexpected civil costs. |
| 2. Civil Brickwork & Shell | Spatial Design | Frame deep curtain pockets and allocate wall space for expanded panels. | Keeps heavy hardware cleanly hidden inside your home’s structure. |
| 3. Core Electrical Conduiting | Cable Infrastructure | Run dedicated low-voltage conduits right alongside your high-voltage mains. | Protects data lines from interference and avoids the need to break finished walls later. |
| 4. Green Bus Cable Pulling | Network Backbone | Pull the hardwired green bus cable in a continuous star loop to all control points. | Establishes a rock-solid, sub-10ms offline local data network. |
| 5. Central Panel Mounting | Control Core | Mount industrial-grade DIN-rail actuators inside the main distribution panels. | Groups all system intelligence into one easily serviceable, safe location. |
| 6. Final Commissioning | Software Tuning | Program custom logic, daylight harvesting curves, and lighting scenes. | Customizes the property to run fully automatically according to your lifestyle. |
Turning Your Renovation Blueprint Into a High-Performance Structural Legacy
Renovating a premium estate is a major investment of your time and capital, designed to build a peaceful, permanent sanctuary for your family. If your automated systems end up requiring regular troubleshooting, look messy with exposed wires, or drop connections whenever the Wi-Fi acts up, your technology turns from a premium luxury into an ongoing operational headache.
At Techtastic, I don’t treat smart automation like a loose collection of retail gadgets. I look at your property through an uncompromising engineering lens, using the trusted global KNX smart home system standard to turn your electrical infrastructure into an invisible, self-optimizing asset that works flawlessly from day one. We take care of the heavy technical planning, precise panel schematics, and hardware integration maps so you can stop wrestling with technology and finally start enjoying true environmental comfort.
🤝 The Partnership Corner
- For Discerning Luxury Homeowners: We join your renovation team during the early structural drafting phase to engineer a rock-solid, offline-first automation blueprint, saving you from battery hassles, network lag, and expensive civil reworks down the line.
- For High-End Architects & Interior Designers: We coordinate seamlessly with your project managers, providing complete electrical wiring schematics, precise panel dimensions, and conduit blueprints to keep your interior aesthetics absolutely immaculate.
Let’s build an efficient digital foundation engineered to endure.
📞 Call/WhatsApp: 9769145145
📍 Engineering Premium Reliability Across: Navi Mumbai | Nashik | Lonavla | Sangli
Technical FAQs on KNX Smart Home System
Q: Why must a KNX smart home system be planned before beginning a home renovation?
A: A KNX smart home system requires early planning because it runs on a centralized physical wiring structure. Every individual lighting loop, climate zone, and motorized curtain track must be routed through dedicated conduits straight back to your central electrical panels during the raw civil shell phase, long before plastering or painting begins.
Q: Can I use standard electrical switch boxes for a hardwired KNX smart home system automation layout?
A: No, standard electrical loop wiring is incompatible with a centralized automation system. Traditional layouts run high-voltage power directly through your wall switches, whereas a KNX smart home system infrastructure routes all main power lines directly to the main distribution board and uses safe, low-voltage green bus cables to connect your wall keypads.
Q: What happens to a hardwired KNX smart home system if the home’s internet connection cuts out completely?
A: Absolutely nothing. Unlike consumer wireless smart products that depend on continuous internet access and volatile cloud servers, an open-protocol KNX smart home system operates completely offline. Every module features its own independent microprocessor, meaning your local lighting, climate control, and security paths continue to execute instantly with zero signal dropouts.